

Spray Cap Mold
2025-02-05 | plast blog
The design of a sprayer cap mold requires attention to the following factors:
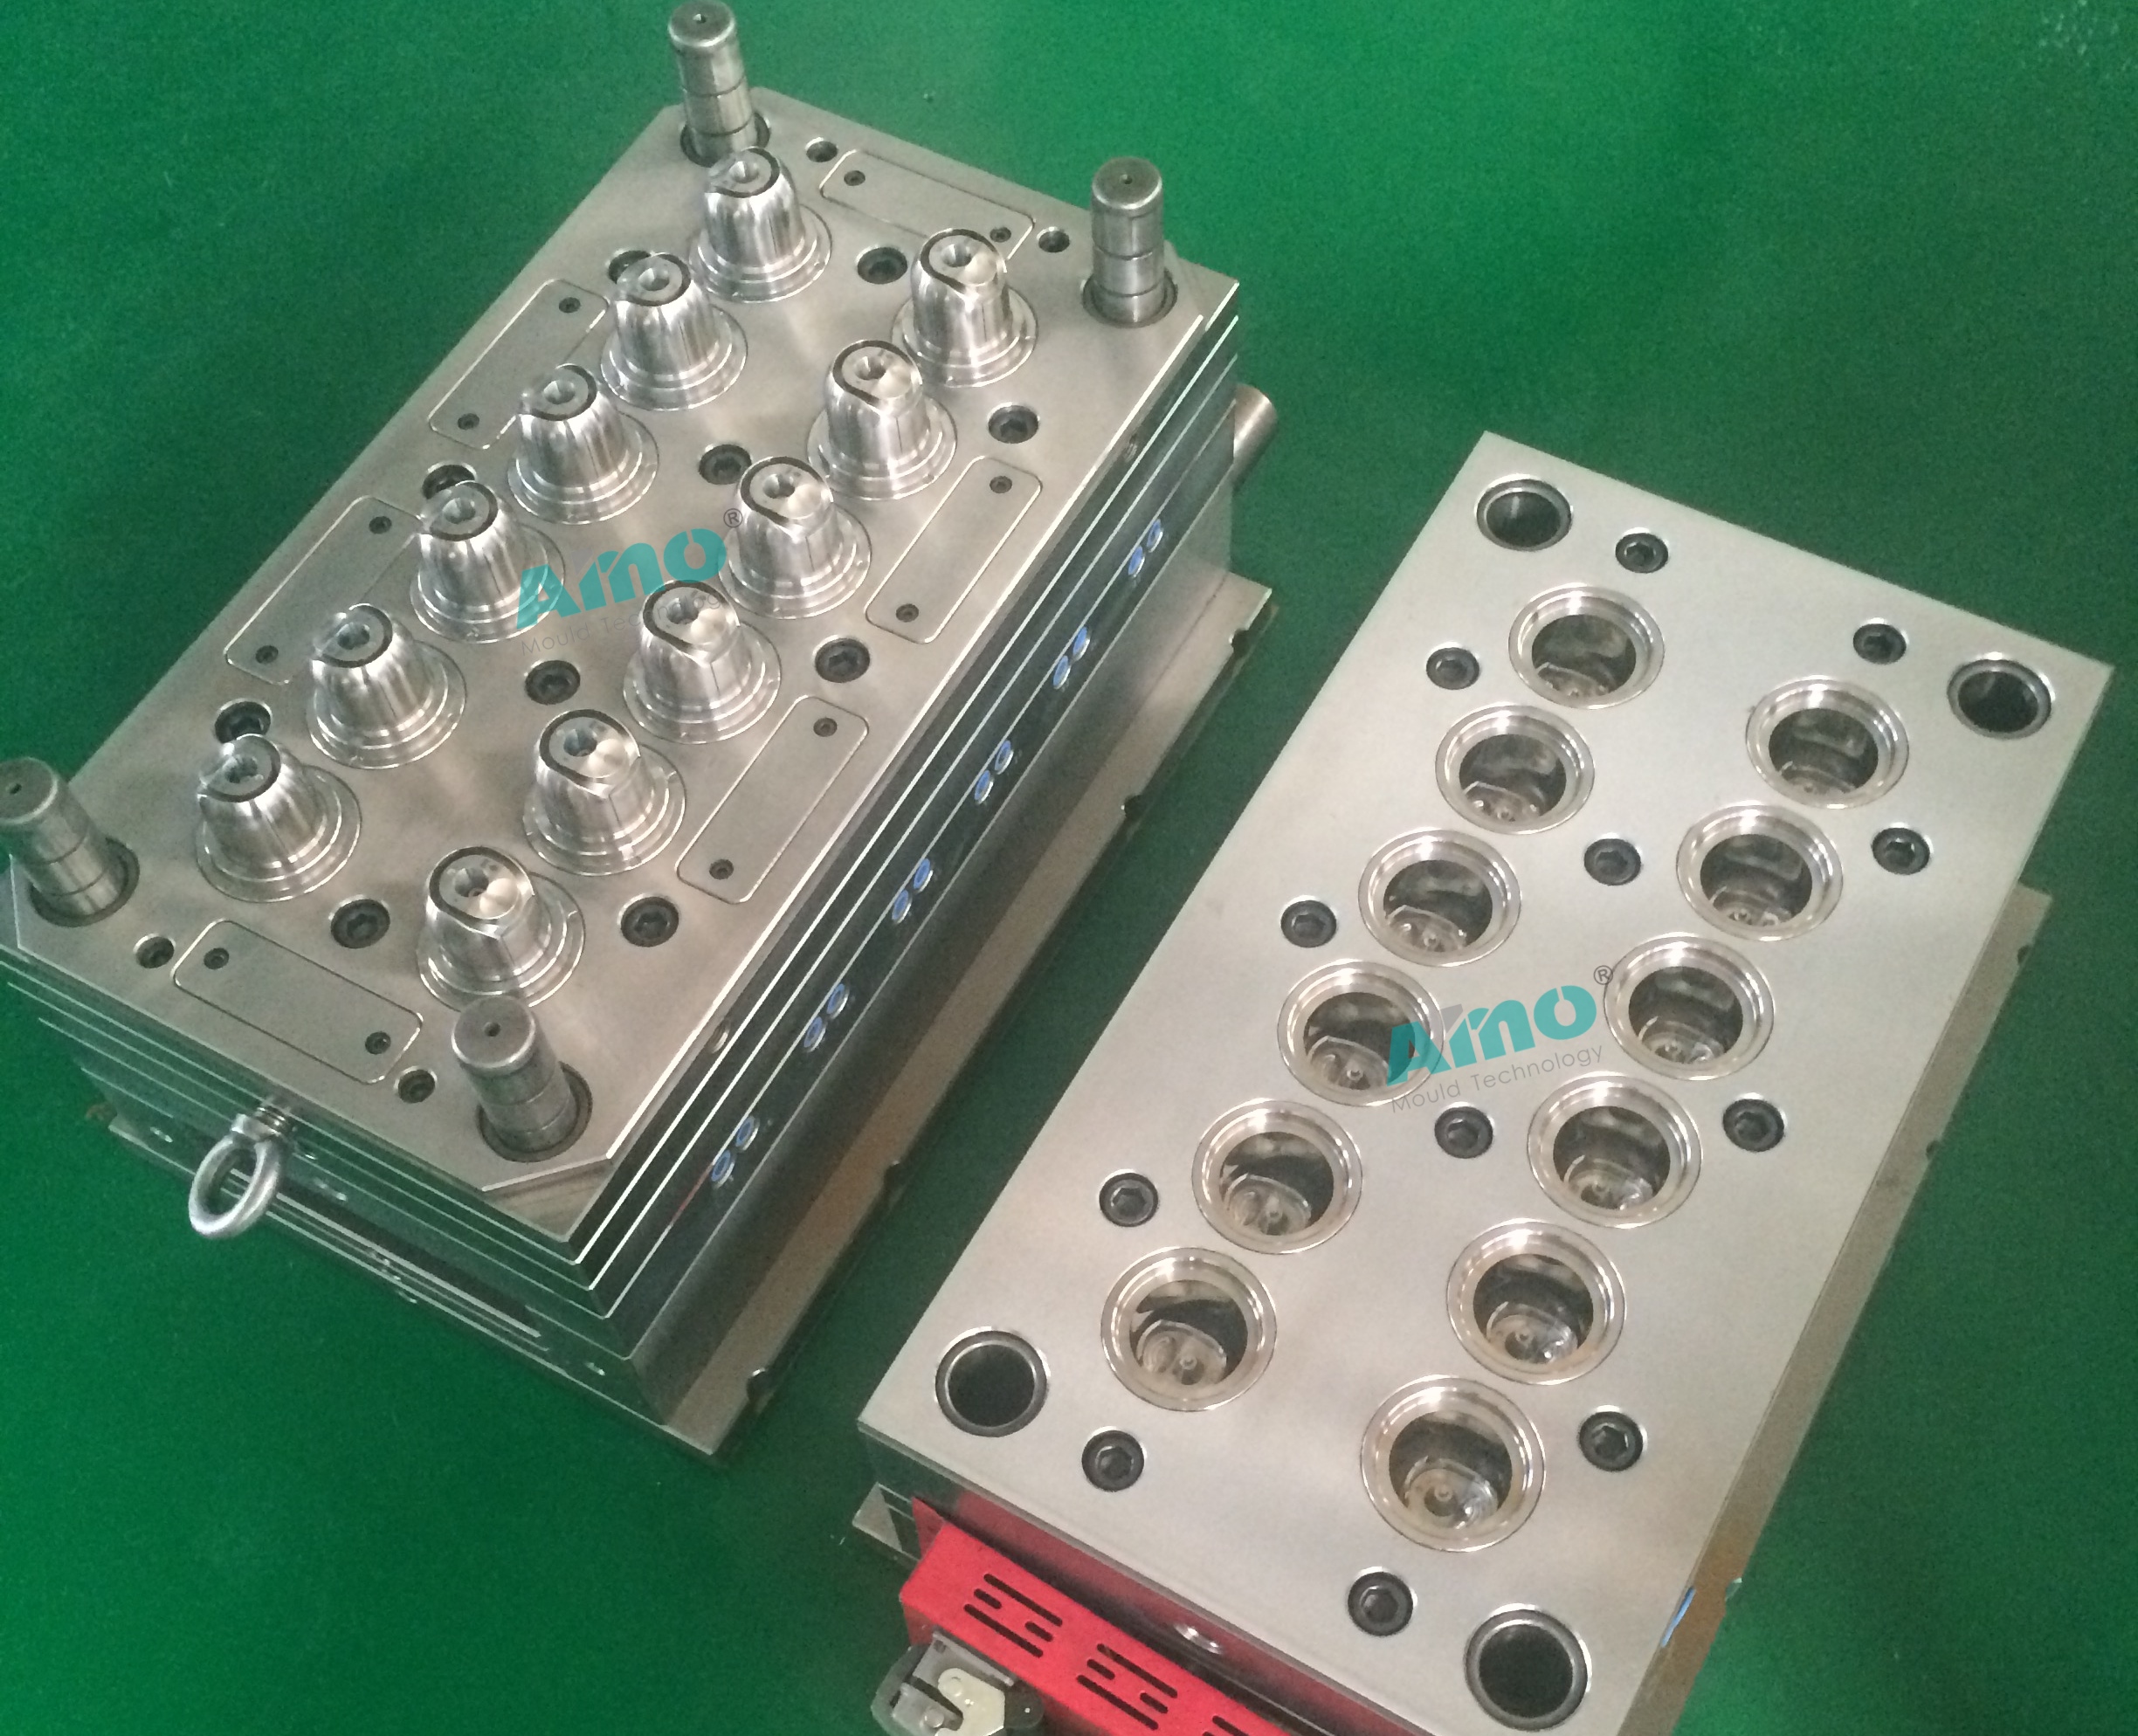
1. Mold Design Features:
• Nozzle and Trigger Mechanism: A sprayer cap usually has a nozzle through which the liquid is dispensed. The mold design must incorporate features that allow for a well-formed nozzle, ensuring that it can control the liquid flow accurately.
• Threading: Many sprayer caps need to have threads (internal or external) so they can screw onto a bottle securely. The mold must be designed to create these threads accurately, as improper threading can lead to leaking or difficulty in sealing the cap onto the bottle.
• Ventilation: To ensure smooth filling and proper material flow during injection, the mold should have well-placed vents to allow air to escape and avoid defects like gas pockets or bubbles.
• Under-Cut Features: Since many sprayer caps feature complex geometries, such as the inner trigger housing, the mold may need to include slides or cores to form these undercuts. This helps create the full geometry of the cap, including the moving parts like the trigger mechanism.
2. Material Selection:
• Polypropylene (PP): This is one of the most commonly used materials for sprayer caps, as it offers excellent chemical resistance, durability, and is lightweight. It’s especially useful for cleaning product or chemical spray bottles.
• Polyethylene (PE): Used less frequently but sometimes chosen for its flexibility and lower cost.
• Acrylonitrile Butadiene Styrene (ABS): Sometimes used for the trigger mechanism because of its toughness and resistance to impact.
3. Injection Molding Considerations:
• Gate Design: The location of the injection gate (where molten plastic enters the mold) is critical. It needs to be placed in a way that minimizes cosmetic defects like visible weld lines on the cap’s surface, especially since sprayer caps are often visible and need to maintain a high aesthetic quality.
• Cooling System: Proper cooling channels within the mold are essential for controlling cycle time and preventing warping. Sprayer caps typically have complex shapes, so efficient cooling ensures that the cap cools evenly, preventing any dimensional inaccuracies.
• Ejection System: The ejection system must carefully remove the sprayer cap from the mold without damaging any delicate features like the nozzle or threads. Ejector pins and sleeves are typically used to push the part out of the mold once it has cooled and solidified.
4. Cycle Time:
• The cycle time for sprayer cap molding is often faster than for more complex parts, but still needs to be carefully controlled to ensure proper filling, cooling, and ejection. This can vary based on the material, complexity of the design, and mold efficiency.
5. Mold Maintenance and Precision:
• Since sprayer caps need to function correctly (especially the trigger or spray nozzle), mold precision is paramount. Any slight variation in mold design or wear can lead to defects such as leaking, difficulty in activating the sprayer, or inconsistent spray patterns. Regular maintenance and mold cleaning are important to keep the molds in optimal condition.
6. Multi-Cavity Molds:
• In mass production, multi-cavity cap molds are often used to increase production efficiency by molding several sprayer caps in one cycle. Each cavity has its own gate and cooling system, allowing for parallel production.

Related News
contact us
Get a Free Quote
Our engineers are available to talk you through each of our offerings. We’ll be sure to reply you within 48hours with detail quotation data. Fill in the form below with as much detail as possible, we’ll get back to you promptly.
SUBMIT